This fortnight, being the last prompt of the year, makes it especially difficult to only choose three cards. So of course we highly recommend you take a good scroll through all the entries, and soak up the fabulous inspiration! Meanwhile, here are three cards that caught our eye:
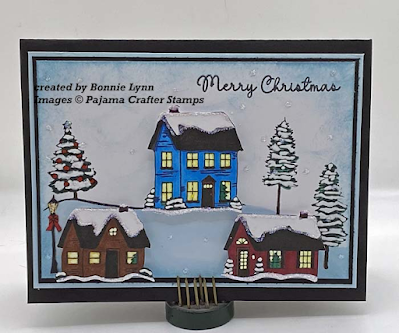
...was inspired by the sparkly snow and evergreens in the blog banner, then added a festive holiday village to her perfectly wintery background!
...chose the colors, snow and glitter, then used a clever and graphic diagonal split for maximum drama AND the super-efficient ability to make cards two-at-a-time, woohoo!
...went full on with the trees, the snow and even a white glitter sentiment on her artful and inky card... be still our hearts!
♥♥♥
Many thanks to all who played along, this fortnight and all throughout the 2025 Jingle Belles season. We really DO love seeing every single card! We'll be back at 12:01am on January 1, 2026 with a brand new prompt, to kick off another brand new season of Jingle Belles fun!
In the meantime, tomorrow we'll post our customary Wrap Up post, featuring all of our cards from the year and with a Linky that will last until Christmas Eve, so you'll have a fun place to show off all your December holiday cards and projects. See you then!


.jpeg)


