It's the first week of October and thus it's time for PINK CHRISTMAS at Jingle Belles; the annual event where we ask YOU to make and link up as many predominantly PINK holiday cards as you possibly can, because WE (Stephanie and Lauren) are each going to donate $2 per card to The Breast Cancer Research Foundation!
So what qualifies as a
PINK CHRISTMAS card? It's pretty simple: the cards should be newly made, with a winter holiday theme, and they should feature
PINK prominently. Does your whole card have to be
pink? Certainly not. Can you combine other colors with the
pink? Of course! Should you have more
pink than say two or three baubles on your green tree set against a snowy white background? Well, yes... that would be good, lol. But other than that, we'll leave it to you to decide how much
pink, what shade, and how to employ it! Can you link up more than one
PINK CHRISTMAS card? Yes, indeed, please do!
Here's what we made this week:
Stephanie's PINK CHRISTMAS Card
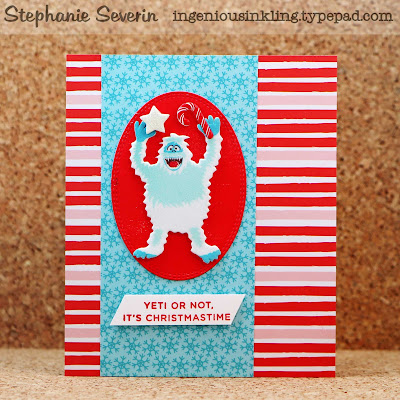
Stephanie says, "My sweet sister-in-law gifted me with these adorable Tim Holtz Christmas Cartoon stamps (which remind me a bit of vintage Calvin and Hobbes), so I couldn't resist stamping them in Catherine Pooler Party Dress Pink on a pink card base. I used a light pink marker to ground the images."

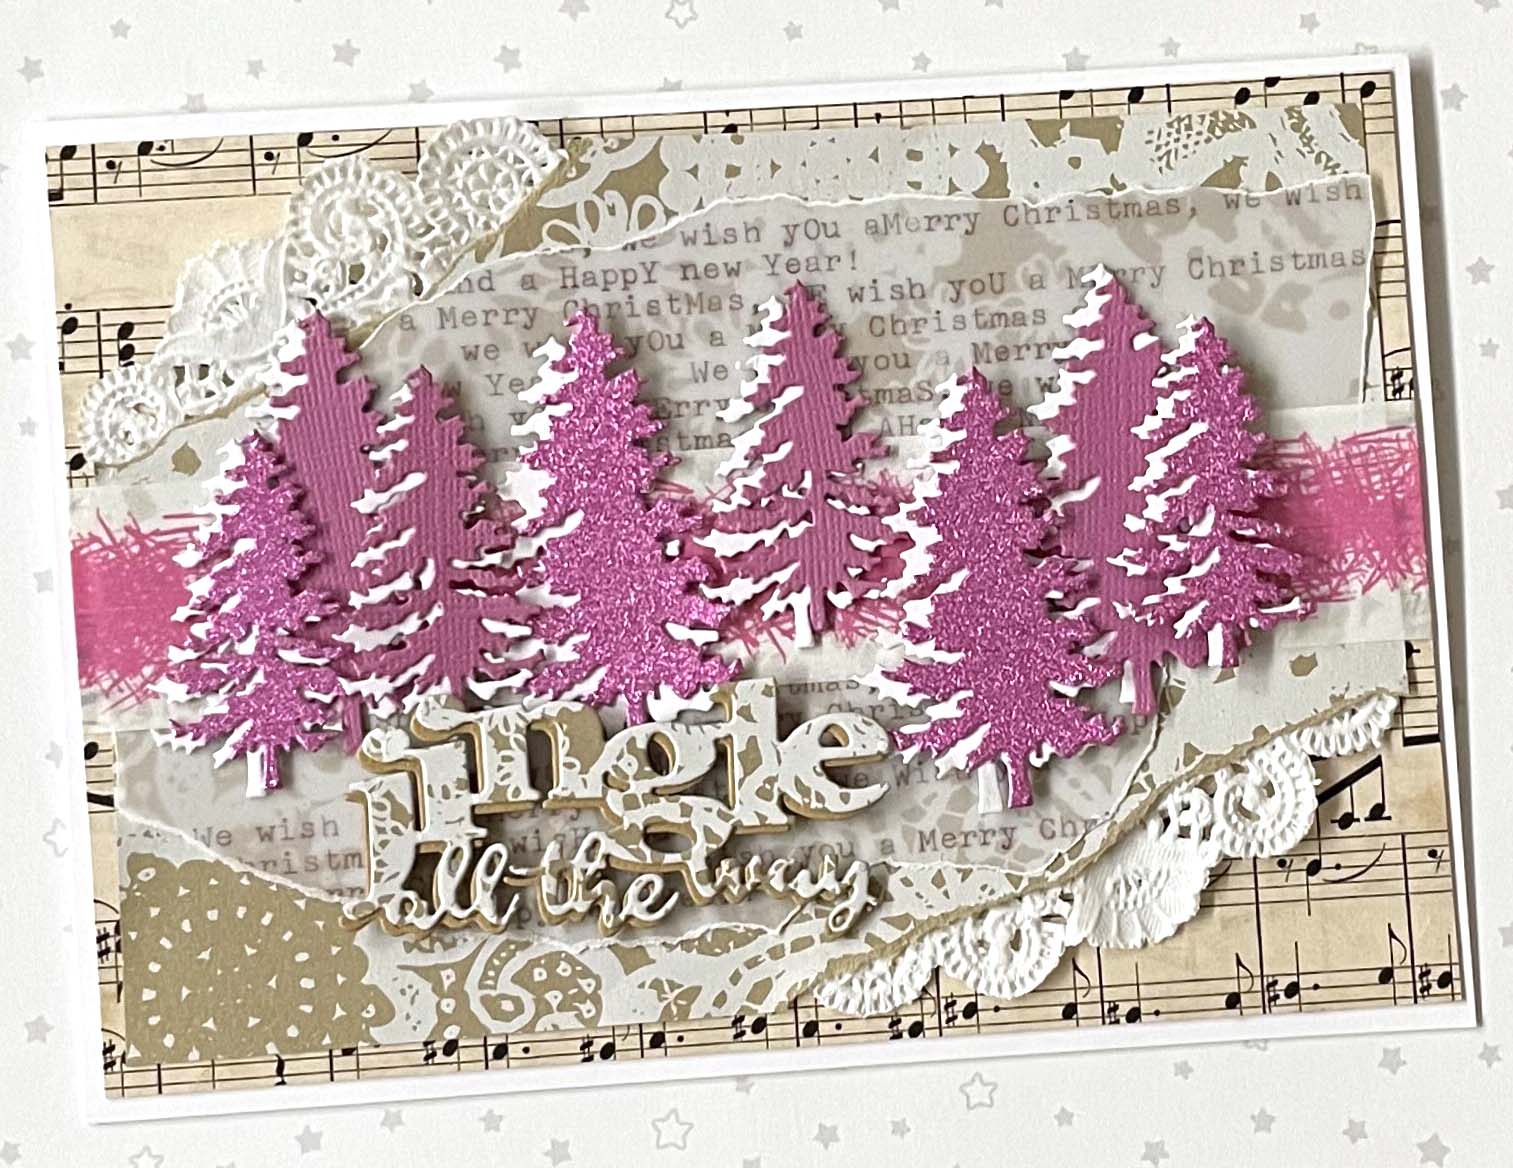
Lauren says, "I built my card around my favorite pink ink: Wendy Vecchi's Rosey Posey Archival from Ranger, so it seemed like a good idea to also break out the gorgeous poinsettia from Wendy's awesome Doodle Christmas stamp set. I gold embossed the blooms and used a waterbrush filled with Isopropyl Alcohol to paint them with the aforesaid Rosey Posey and Leaf Green. I added Sunflower Liquid Pearls to the centers and made a larger flower cluster on top of a background featuring a scrap of ancient Prima pink plaid paper, torn sheet music and a few strips of washi tape. I have literally no idea where that little sentiment sticker came from, but it was the perfect size and shape, so on it went!"
♥♥♥♥♥
Link as many PINK CHRISTMAS cards as you'd like, right here by 6pm (Eastern) on Wednesday, October 18th. Keyword for galleries and Flickr is JB2321.


.jpg)


.jpg)

